


Inspection & DGUV
How to correctly affix and read inspection stickers – A guide for businesses
Inspection stickers show at a glance whether a piece of work equipment has been inspected and when the next inspection is due. This guide explains how to affix stickers correctly, how to read the month ring and the annual colours, and which materials are suitable for which purposes.
What is an inspection sticker?
An inspection sticker is a self-adhesive label that is affixed to the inspected equipment or work equipment after it has passed a safety inspection. It shows the date of the last inspection and – depending on the design – the date of the next scheduled inspection. Inspection labels are used wherever equipment needs to be inspected regularly: on electrical equipment in accordance with DGUV Regulation 3, on ladders and steps in accordance with BetrSichV, on cranes, shelving, fire extinguishers, doors and gates in accordance with ASR A1.7, and on measuring and testing equipment.
When are inspection stickers mandatory?
The inspection itself is a legal requirement – marking with a sticker is strongly recommended in many regulations or is de facto standard. DGUV Regulation 3 (formerly BGV A3) requires that the next inspection date for electrical equipment be clearly visible on the device. The Industrial Safety Regulation (BetrSichV) and the Technical Rules for Industrial Safety (TRBS) also require traceable documentation. An inspection sticker fulfils this requirement directly on the equipment and supplements the written inspection report.
Important: The sticker may only be affixed once the inspection has been properly carried out and documented. It confirms the result – it does not replace the inspection report.
How to read an inspection sticker correctly
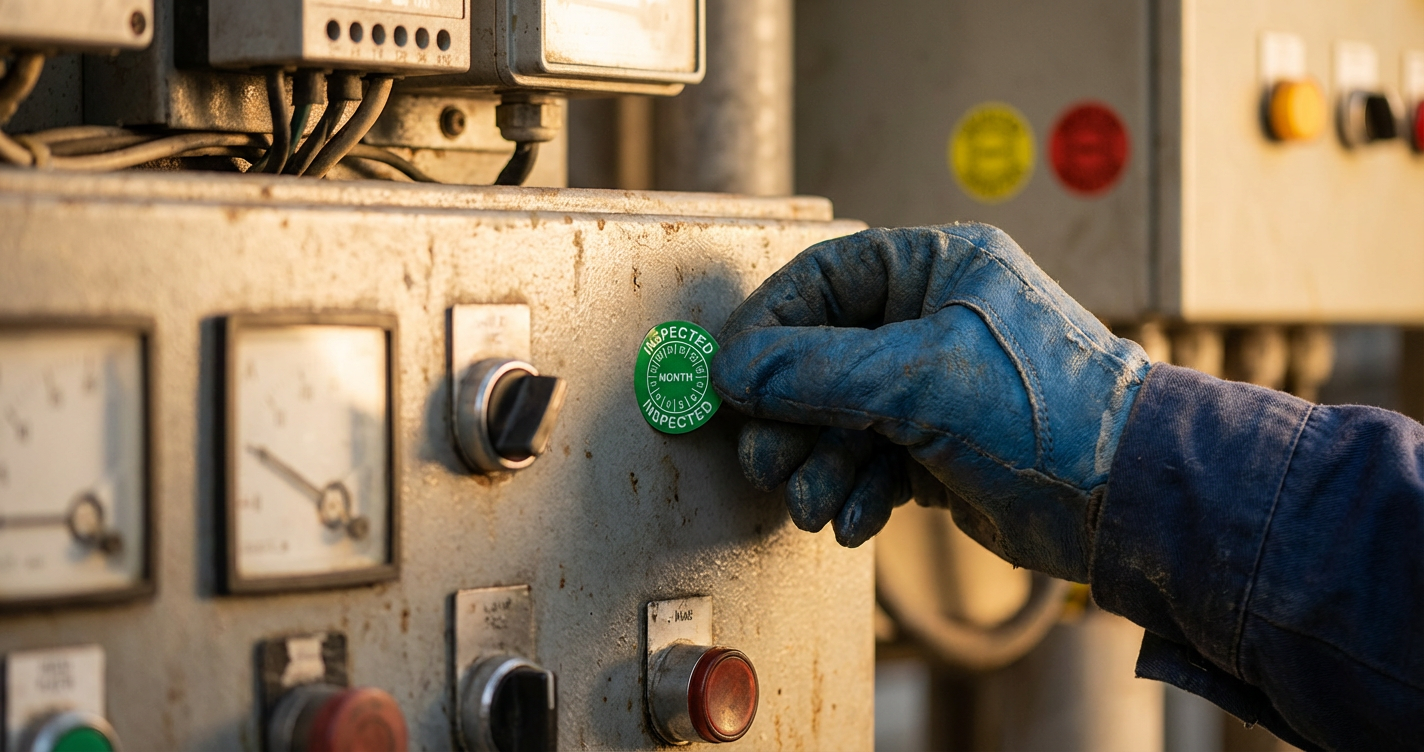
Most inspection stickers are round and contain three levels of information:
1. Month ring (outer ring): The numbers 1–12 are arranged in a circle. The inspector marks the month of the next inspection with a notching pliers or a waterproof pen.
2. Year (centre): The year in which the next inspection is due is shown in the centre. For multi-year labels, several years are printed – the inspector marks the relevant one.
3. Label text: Above or in the margin is the purpose of the inspection, e.g. ‘Next inspection date’, ‘Inspected in accordance with DGUV V3’ or ‘Next calibration’.
On a 3-line inspection label, the inspector’s initials and the date of the last inspection can also be entered. This ensures complete traceability directly on the device.
Annual colours – the 6-year cycle
To distinguish between inspected and uninspected devices at a glance, inspection stickers use a fixed colour cycle that repeats every six years:
Practical tip: If you only see brown stickers during an inspection, you know straight away: all these appliances have been tested until 2026. If a yellow sticker (2025) appears, this appliance may be overdue.
How to apply inspection stickers correctly – 5 steps
To ensure the sticker adheres securely and remains legible, please note the following points:
1. Prepare the surface: The surface must be free of dust and grease. Clean the area with isopropyl alcohol or a grease-dissolving cleaner. Stickers adhere best to painted, powder-coated or smooth metal surfaces.
2. Consider the temperature: The optimum application temperature is at least +10°C. In cold conditions, the adhesive adheres significantly less effectively. If possible, apply labels in temperature-controlled rooms.
3. Choose a visible location: The label must be legible without the aid of tools – not behind covers, cables or in recesses. On electrical appliances, the area near the type plate is suitable; on ladders, the inside of the rung.
4. Mark the month and year: Use a notching pliers (hole punch pliers) or a waterproof, permanent marker pen. The marking must be clear and permanent.
5. Press firmly: Press the label evenly with your thumb, working from the centre outwards. This prevents air bubbles that could trap moisture.
Materials and tamper-proofing
Not every inspection sticker is made of the same material. The choice depends on the location and safety requirements:
PE film – the classic choice. Oil and dirt-repellent, heat-resistant, mechanically robust. Suitable for the majority of inspection labels for both indoor and outdoor use.
Documentation film – shatters into small fragments when removed. It is impossible to remove or reposition it without being noticed. Ideal for security-critical applications.
VOID film – leaves the word ‘VOID’ on the surface when removed. This makes any attempt at tampering immediately visible.
Security perforation – a perforation prevents the label from being removed intact. The label tears whenever an attempt is made to remove it.
For rough or uneven surfaces, a test label holder is recommended: a self-adhesive base plate made of aluminium or plastic onto which the label is stuck. This makes it easier to replace the label at the next inspection and protects it from mechanical stress.
Avoiding common mistakes
Apply the sticker before the inspection: The sticker documents a result. Inspect first, then stick – never the other way round.
Failure to remove the old label: If a new label is stuck over the old one, the test history and the current date are difficult to read. The old label should be removed or made illegible.
Choosing the wrong size: Standard diameters are 20 mm, 25 mm and 30 mm. For small devices (e.g. multi-socket sockets), 20 mm is sufficient; for machines and control cabinets, 30 mm is more legible.
Illegible marking: Ballpoint pens or standard felt-tip pens fade. Use only permanent, waterproof markers or a notching tool.
Inspection labels at Barcodeetiketten.com
Our range includes inspection labels for all standard inspection regulations – from DGUV Regulation 3 and VDE 0701/0702 to ladders and step stools. All labels are made from robust PE film, available in various annual colours and diameters (20 mm and 30 mm), and are supplied in convenient rolls.